The secret to avoiding the $300-$500+ one-way rental fee in Canada is to stop thinking in a straight line and treat it as a logistical penalty, not a tax.
- Instead of a one-way trip (e.g., Vancouver to Calgary), plan a circular “loop” trip starting and ending in the same city (e.g., Calgary).
- Combine this cheaper loop rental with a budget one-way flight to cover the long distance, saving you up to $550 CAD.
Recommendation: Use this “Circular Route Strategy” to outsmart the rental system by eliminating the company’s cost of repatriating the vehicle, which is the real reason for the fee.
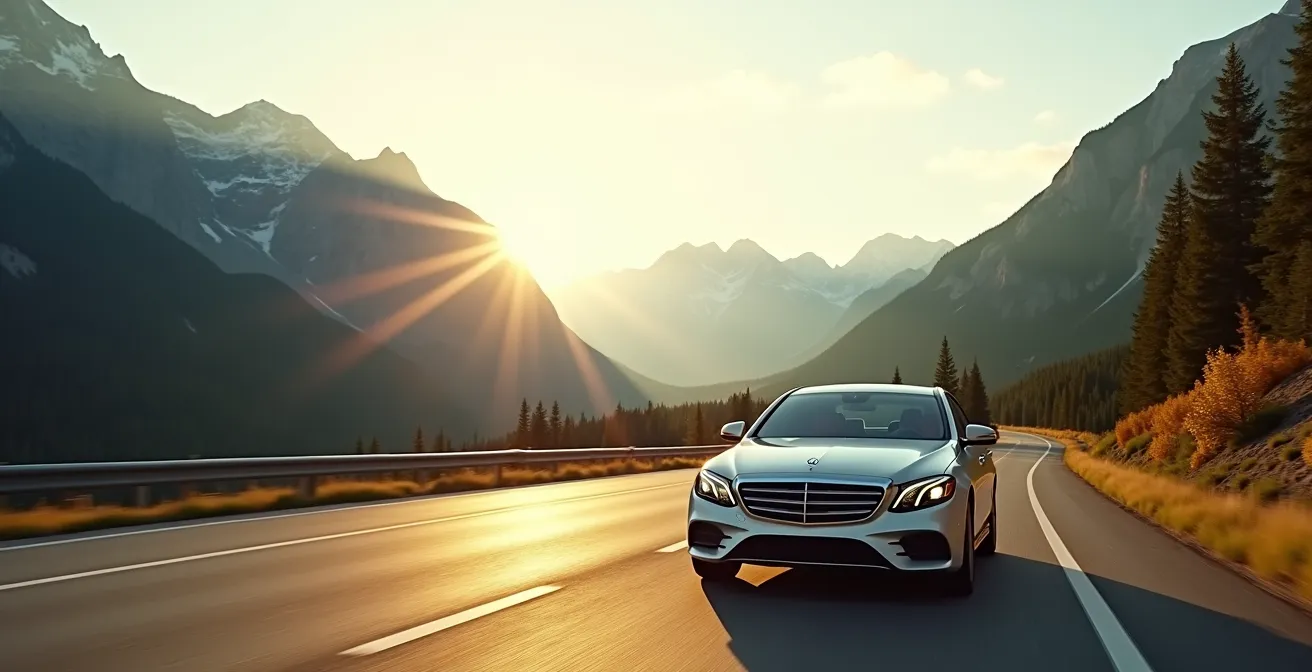
You’ve mapped it all out: a breathtaking drive from the coastal beauty of Vancouver to the majestic peaks of the Canadian Rockies in Calgary. You find a great weekly rate on a rental car, plug in your dates, and then it hits you—a “one-way fee” or “drop charge” of $300, $500, or even more. Suddenly, your budget is shattered. Many tourists either reluctantly pay it or, worse, abandon their dream road trip. The common advice is to compare companies or look for deals, but these rarely make a dent in this specific charge.
But what if this fee isn’t an unavoidable tax, but rather a logistical penalty you can strategically sidestep? The fee exists for one simple reason: the rental company has to pay an employee to drive your car all the way back to its original location. It’s a vehicle repatriation cost. Once you understand this, the power shifts to you. The key isn’t to find a company that magically waives the fee; it’s to design an itinerary where the logistical problem—and therefore the penalty—never exists in the first place.
This guide moves beyond generic tips. We’ll deconstruct the hidden traps in Canadian car rentals, from credit card insurance that fails when you need it most to the costly mistake of having the wrong tires in October. We will provide a framework for planning a smarter trip, focusing on a core “Circular Route Strategy” that can save you hundreds of dollars while giving you even more freedom to explore. It’s time to stop paying the penalty and start outsmarting the system.
This article provides a comprehensive roadmap to help you navigate the complexities of renting a car for a Canadian road trip. The following sections break down the critical financial, logistical, and legal details you need to master.
Summary: A Strategic Guide to Canadian Car Rental
- Why does your credit card insurance potentially fail in Canada?
- How to calculate drive times when 100km takes 2 hours on mountain roads?
- The circular route strategy that saves you $500 CAD on rental fees
- The rental counter mistake that leaves you illegal on BC highways in October
- When to book BC Ferries to ensure your itinerary doesn’t collapse?
- RV rental vs. car and hotel: which option is cheaper for a 14-day family trip?
- In what order should you visit the Mountain Parks to save driving time?
- How to plan fuel stops on the Trans-Canada Highway where stations are 200km apart?
Why does your credit card insurance potentially fail in Canada?
Relying solely on your credit card’s rental car insurance is a common money-saving tactic, but in Canada, it’s a gamble that can backfire spectacularly. While you may have excellent coverage at home, the specifics of the Canadian rental market can render it useless. The Canadian rental car industry has grown to $6.3 billion in 2024, and its rules are tailored to its own environment. The most common pitfall is the Manufacturer’s Suggested Retail Price (MSRP) limit on covered vehicles.
Many premium credit cards offer Collision Damage Waiver (CDW) coverage, but they cap the value of the vehicle they’ll insure. According to an in-depth analysis, most Canadian credit cards limit coverage to vehicles with an MSRP of $65,000 or $85,000 CAD. For American visitors, this translates to only about US$50,000 to US$67,000. That full-size SUV or premium sedan you booked for your family’s comfort? It could easily exceed this cap, meaning your credit card insurance would be void from day one, leaving you completely exposed.
Furthermore, the fine print contains other exclusions. Most policies won’t cover rentals longer than 48 consecutive days. Another critical detail is coverage for “Loss of Use”—a fee rental companies charge for the income they lose while a damaged car is being repaired. Many non-Canadian cards specifically exclude this charge, which can amount to hundreds or even thousands of dollars. Before declining the rental company’s insurance, you must call your card provider and ask pointed questions: What is the exact MSRP limit in Canadian dollars? Is Loss of Use covered in Canada? Is your coverage primary or secondary? Assuming you’re covered without verifying these details is a high-stakes financial risk.
How to calculate drive times when 100km takes 2 hours on mountain roads?
When planning a road trip through the Canadian Rockies, your most trusted tool, Google Maps, can become your most misleading guide. On a map, the 148 km between Revelstoke and Golden looks like a simple 90-minute drive. In reality, winding mountain passes, single-lane construction zones, and sudden wildlife sightings can easily turn it into a three-hour journey. Underestimating travel time is the fastest way to a stressful trip, missed bookings, and driving on treacherous roads in the dark.
The core issue is that mapping algorithms calculate time based on speed limits, not on-the-ground reality. They don’t account for the steep grades that slow trucks to a crawl, the necessary photo stops at breathtaking viewpoints, or the “bear jams” that bring traffic to a standstill. A 100 km/h speed limit is purely theoretical when you’re navigating the hairpin turns of the Icefields Parkway or stuck behind a slow-moving RV with no passing lanes for 20 kilometres.
This dramatic mountain road winding through the Canadian Rockies landscape symbolizes the journey’s complexity. The serpentine curves and elevation changes are beautiful but demand respect and, more importantly, time. This is the terrain where standard calculations fail.
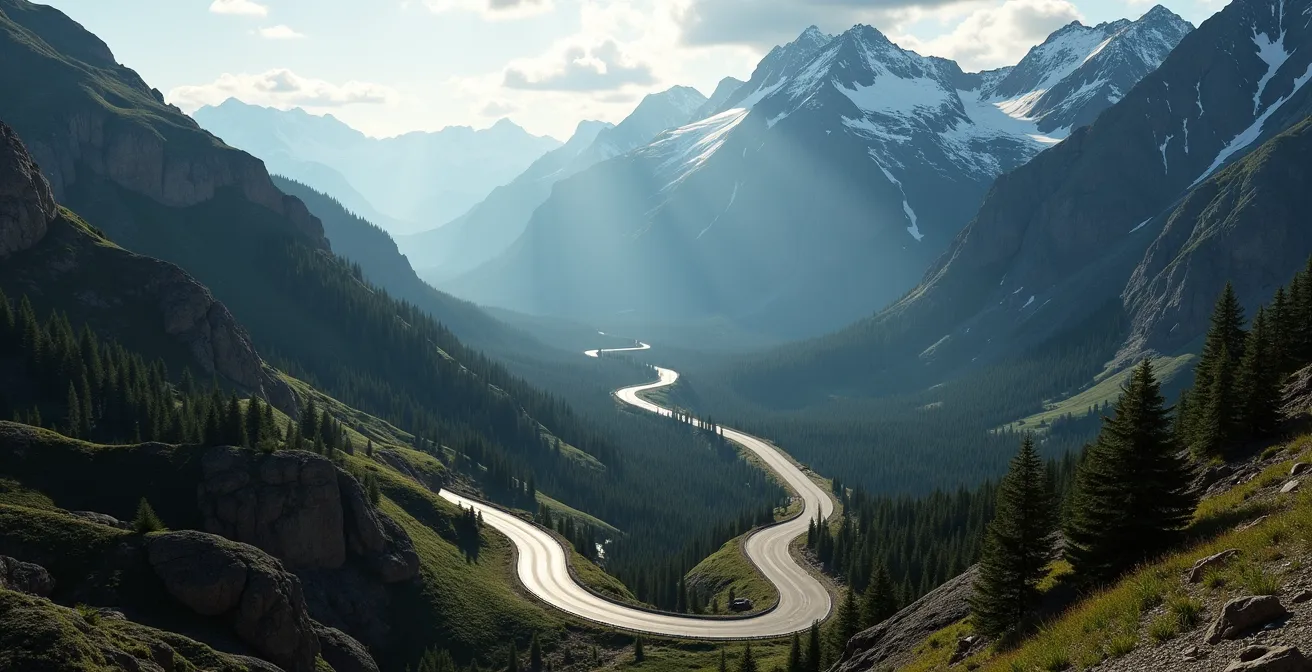
As an insider, I advise clients to use a more realistic formula. Start with the Google Maps estimate, then multiply it by 1.5 for any mountain route. Next, add 30 minutes for each major planned stop (like Athabasca Falls or Peyto Lake). Finally, build in a buffer of at least one hour per day for unplanned delays like wildlife, weather, or construction. This method transforms a frantic, clock-watching dash into a relaxed and enjoyable journey, which is the entire point of a Rockies road trip. Driving these roads is part of the destination, not an obstacle to be rushed.
The circular route strategy that saves you $500 CAD on rental fees
This is the core strategy that directly counters the exorbitant one-way rental fee. Instead of viewing your trip as a linear path from City A to City B, you reconceive it as a loop. By starting and ending your rental in the same city, the “logistical penalty” of vehicle repatriation disappears, and the one-way fee is completely eliminated. This simple shift in perspective can easily save you $300 to $500 CAD, or even more during peak season.
Here’s how it works in practice for a Vancouver-to-Calgary trip. The classic approach is to rent in Vancouver and drop off in Calgary, incurring the massive fee. The smart strategy is to book a cheap, one-way flight from Vancouver to Calgary. Upon arrival in Calgary, you rent a car for your entire Rockies adventure, explore Banff, Jasper, and the surrounding areas, and then return the car to Calgary. From there, you fly home. The cost of the one-way flight (often around $100-$150 CAD if booked in advance) is a fraction of the one-way rental fee.
This strategy can be further optimized by renting from a non-airport location. A NerdWallet analysis found airport car rentals are often 26% more expensive due to added taxes and concession fees. By taking a taxi or rideshare to a downtown or suburban rental branch, you can stack your savings. The table below illustrates the stark difference in cost.
| Route Type | Rental Cost | Drop-off Fee | Total Cost |
|---|---|---|---|
| Calgary to Vancouver One-Way | $700 (7 days) | $300-500 | $1000-1200 |
| Calgary Loop + Budget Flight | $500 (7 days) | $0 | $500 + $150 flight = $650 |
| Savings | $350-550 CAD | ||
The numbers speak for themselves. By investing an hour to take a short flight, you effectively “earn” back hundreds of dollars. This is the ultimate example of outsmarting the system. You are no longer at the mercy of the rental company’s logistics; you’re creating a more efficient plan that benefits your wallet.
The rental counter mistake that leaves you illegal on BC highways in October
Here is a critical piece of insider knowledge that can save you from a hefty fine and a dangerous situation. If your Canadian Rockies road trip is planned for the shoulder season, specifically between October 1st and April 30th, you must pay close attention to your rental car’s tires. During this period, British Columbia legally requires all vehicles on most major highways—including the Trans-Canada Highway through the mountains—to be equipped with proper winter tires.
The problem arises when you rent a car in Alberta (e.g., Calgary or Edmonton) and plan to drive into B.C. Alberta does not have a province-wide mandatory winter tire law. Consequently, rental companies in Calgary often equip their standard fleet with “All-Season” tires. These tires are not compliant with B.C.’s law. The police in B.C. actively run checkpoints, and if you are caught without compliant tires, you face a fine and may be forced to turn back, completely derailing your itinerary. The liability falls on the driver, not the rental company.
Compliant tires must have at least one of two symbols on the sidewall: the M+S (Mud and Snow) marking or the Three-Peak Mountain Snowflake (3PMSF) symbol. When you pick up your car in Calgary, you must be proactive. Do not simply ask, “Does this car have winter tires?” as the agent might say “yes” thinking of all-seasons. You need to be specific and verify the symbols yourself. If the vehicle doesn’t have them, you must request and often pay extra for a vehicle that does. This small upgrade fee is insignificant compared to the cost and danger of being unprepared for a sudden mountain snowstorm or a legal checkpoint.
Your BC Winter Tire Law Compliance Checklist
- Verify dates: From October 1st to April 30th, winter tires are legally required on designated BC highways.
- Check tire sidewalls: Look for the M+S (Mud and Snow) marking or the Three-Peak Mountain Snowflake symbol.
- Ask specifically: “Can you confirm this vehicle has M+S or snowflake-rated tires for BC highways?” Don’t accept a vague “yes.”
- Request documentation: If crossing from Alberta, get written confirmation of the tire type on your rental agreement.
- Know the liability: You, the driver, are responsible for the fine, not the rental company that gave you the non-compliant car.
When to book BC Ferries to ensure your itinerary doesn’t collapse?
If your Western Canada road trip includes a visit to Vancouver Island, treating BC Ferries as a casual, show-up-and-go service is a recipe for disaster. During the peak season (June to September) and especially on long weekends, the main routes like Tsawwassen (Vancouver) to Swartz Bay (Victoria) can sell out days or even weeks in advance. Arriving without a reservation can lead to multiple sailing waits, turning a 90-minute ferry ride into a 5-hour ordeal that throws your entire day’s schedule into chaos.
The key is to think of the ferry not as public transit, but as a flight you must book ahead. As a general rule for summer travel, you should book your ferry crossing at least one to two weeks in advance. However, for Canadian statutory holidays like Canada Day (July 1st), BC Day (first Monday in August), or Labour Day (first Monday in September), the advice is more urgent. For Canadian long weekends, BC Ferries reservations can sell out 3-4 weeks in advance. As soon as your flights and rental car are confirmed, the ferry should be your next booking. The reservation fee is a small price to pay for the certainty that your itinerary will hold together.
Many travelers ask if they should risk going on standby to save the reservation fee. On a Tuesday in October, perhaps. But on a Friday afternoon in July? Absolutely not. You will almost certainly face a multi-sailing wait. A better cost-saving strategy is to look for “Saver Fares.” These are cheaper, non-refundable fares offered on less popular sailings, typically mid-day and mid-week. If your itinerary is flexible, traveling on a Wednesday instead of a Friday can cut your ferry cost by 30-50%, easily offsetting the cost of an extra hotel night if needed. Planning your ferry crossing with the same diligence as your flights is the hallmark of a savvy Canadian road tripper.
RV rental vs. car and hotel: which option is cheaper for a 14-day family trip?
The vision of a family road trip in a recreational vehicle (RV) is a powerful one: freedom, nature, and cozy evenings under the stars. It’s often assumed to be a more budget-friendly option than renting a car and staying in hotels. However, a detailed cost analysis reveals a surprising truth: for a typical 14-day family trip in the Canadian Rockies, the car and hotel combination is often the more economical choice. The perceived savings of an RV are frequently erased by a host of hidden costs.
While an RV combines your transport and accommodation, it comes with a much higher base rental cost and significantly worse fuel economy. More importantly, it introduces a list of ancillary fees that first-timers rarely anticipate. A case study of a family of four highlighted these “hidden” expenses, which included per-kilometer charges after exceeding a minimal daily allowance, mandatory “prep fees” just to get the vehicle, propane refills, and dump station fees. Furthermore, the idea of “free” accommodation is a myth; national park campsites still cost $30-$45 per night and must be booked months in advance during peak season.
Let’s break down the real numbers for a hypothetical 14-day trip for a family of four, covering 2000 km. The data, sourced from an analysis of Canadian travel costs, clearly shows the advantage of the car and hotel option.
| Cost Category | RV Rental | Car + Hotel |
|---|---|---|
| Vehicle Rental (14 days) | $2,800 | $700 |
| Accommodation | $420 (campsites @ $30/night) | $1,960 (hotels @ $140/night) |
| Fuel (2000km) | $430 (25L/100km) | $260 (10L/100km) |
| Food | $840 (groceries + cooking time) | $1,120 (mix of restaurants) |
| Additional Fees | $200 (propane, prep fees) | $0 |
| Total | $4,690 | $4,040 |
While the RV offers a unique lifestyle experience, it is not the budget-friendly choice it appears to be. The savings on restaurant meals are often offset by the time spent on grocery shopping, cooking, and cleaning in a cramped space. For pure financial efficiency and flexibility, a well-planned trip with a rental car and pre-booked hotels provides better value.
In what order should you visit the Mountain Parks to save driving time?
Once you’ve adopted the circular route strategy starting from Calgary, the next level of optimization is planning the sequence of your park visits. The order in which you visit Banff and Jasper can significantly impact your experience, helping you avoid crowds, minimize driving on peak traffic days, and reduce backtracking. There are two primary strategic routes to consider, each with distinct advantages.
The first is the “Classic Route”: Calgary → Banff → Lake Louise → Icefields Parkway → Jasper, and then returning to Calgary. This is the most intuitive route, following a natural geographic progression north. Its main benefit is that you get to iconic, high-priority spots like Lake Louise and Moraine Lake early in your trip. However, this often means you’ll be in the busiest areas (Banff/Lake Louise) on a weekend if you start your trip on a Friday, leading to parking nightmares and crowded trails.
The more strategic option, especially for those looking to avoid crowds, is the “Anti-Crowd Route”. This involves driving from Calgary directly to Jasper via Highway 11, the David Thompson Highway. You then travel south down the Icefields Parkway to Banff and Lake Louise before returning to Calgary. The advantages are huge: you start your trip in the less-crowded Jasper area, and you drive the spectacular Icefields Parkway on a weekday when tour bus traffic is lighter. The David Thompson Highway itself is a hidden gem, offering stunning views with a fraction of the traffic of the Trans-Canada Highway. An experienced traveler’s advice reinforces this approach.
After three trips through the Canadian Rockies, I’ve learned that starting with Jasper via Highway 11 is game-changing. You avoid the Banff parking nightmare on weekends, and the David Thompson Highway is a hidden gem with stunning views and almost no traffic. The Icefields Parkway is best mid-week – we drove it on a Thursday and had many pullouts to ourselves. Book your Columbia Icefield Adventure tickets first, then build your itinerary around that fixed time.
– Experienced traveler, RentalCover.com Blog
Ultimately, the best strategy is often dictated by the availability of time-sensitive bookings. Secure your reservations for high-demand activities like the Moraine Lake shuttle or the Athabasca Glacier tours first. Then, build your driving route around these fixed points in your schedule, using the Anti-Crowd Route as your default for a more serene experience.
Key takeaways
- The one-way fee is a “logistical penalty” for vehicle repatriation, not a mandatory tax.
- The “Circular Route Strategy” (loop trip + one-way flight) is the most effective way to eliminate the fee, saving $350-$550 CAD.
- Always verify your credit card’s MSRP limit and winter tire compliance (Oct-Apr) to avoid major hidden costs and legal issues.
How to plan fuel stops on the Trans-Canada Highway where stations are 200km apart?
On the vast, remote highways of the Canadian Rockies, a full tank of gas is more than a convenience; it’s a critical safety measure. Cell service is spotty at best, and stretches of road can be completely devoid of services for immense distances. Running out of fuel here is not a simple inconvenience—it’s a potentially dangerous situation. The most infamous of these routes is the Icefields Parkway, which has a 232-kilometer stretch between Jasper and Lake Louise with only one seasonal, and very expensive, gas station at Saskatchewan River Crossing.
This reality requires a shift in mindset. You can no longer wait until the fuel light comes on. The cardinal rule for driving in the Rockies is the “Half-Tank Rule”: the moment your fuel gauge drops below 50%, your top priority becomes finding the next gas station. Never pass a gas station in a major town like Canmore, Banff, or Jasper without filling up, especially if you are about to enter a national park or a known “gas desert.” This simple habit provides a crucial buffer for unexpected detours, long delays, or finding a station unexpectedly closed.
Be aware that fuel in remote areas comes at a premium. The single station on the Icefields Parkway is a prime example. Data shows that remote gas stations like Saskatchewan River Crossing charge 25-40% higher prices than in cities. Paying this premium is better than being stranded, but the savvy traveler avoids it by fueling up strategically. Before you lose cell service, download an offline map (like Google Maps offline feature) and mark the locations of gas stations along your route. This preparation is not about saving a few dollars; it’s about ensuring your trip is safe, seamless, and free from the stress of “range anxiety.” For truly remote backcountry routes, carrying a small, approved 5-10L fuel container is a wise extra precaution.
By applying these insider strategies—from outsmarting the one-way fee to meticulously planning your fuel, tires, and timing—you transform yourself from a typical tourist into a strategic traveler. Your Canadian Rockies road trip will not only be more affordable, but also safer and infinitely more enjoyable.