The key to a successful family whale watching adventure isn’t just choosing a boat; it’s understanding the ‘why’ behind expert advice to ensure safety, comfort, and a truly magical experience.
- Dressing properly is a science; the right layers prevent dangerous cold shock, not just discomfort.
- Respecting legal approach distances isn’t just about avoiding fines—it’s about protecting the whales from life-threatening stress.
Recommendation: Prioritize tour operators who educate you on these principles, as their commitment to safety and conservation is the best guarantee of an exceptional family trip.
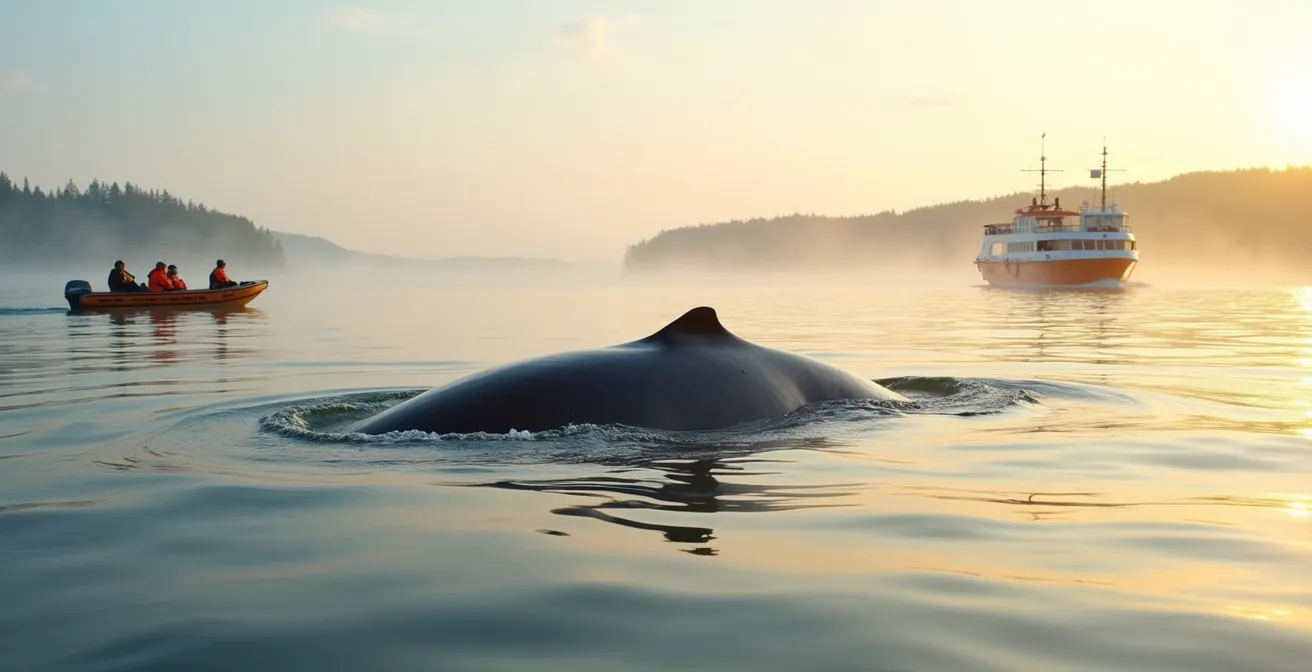
The thought of seeing a whale breach against the backdrop of Canada’s rugged coastline is an incredible motivator for a family vacation. For children and adults alike, it’s a moment of pure awe. Yet, for parents planning the trip, the excitement is often mixed with a current of very practical questions. Will the kids get seasick? How do we possibly stay warm on a boat in the middle of the St. Lawrence or the Salish Sea? Is a small, fast Zodiac safe for a family, or is a larger vessel better? The internet offers simple advice like “dress in layers” or “pick a calm day,” but this often falls short of providing real confidence.
These concerns are valid, and they point to a deeper truth about marine excursions. A truly unforgettable and safe whale watching experience goes beyond luck and basic tips. It hinges on understanding the environment you are entering. The real key isn’t just knowing *what* to do, but *why* you are doing it. It’s about grasping the simple biology of how whales live, the physics of how your body loses heat, and the ecological principles that govern responsible viewing. This guide is built on that philosophy. As a marine biologist and tour operator, my goal is to empower your family with the knowledge to move from tourist to informed adventurer, making choices that maximize not only your enjoyment but also your safety and the well-being of the magnificent animals you’ve come to see.
This article will guide you through the critical decisions and preparations for your trip, from the biological reasons for whale distribution to the practicalities of dressing for the cold and safely navigating coastal environments. By understanding these core principles, you’ll be equipped to plan an adventure that is both thrilling and responsible.
Summary: The Ultimate Canadian Family Whale Watching Guide
- Why are orcas resident in BC while humpbacks migrate to the Atlantic?
- How to dress for a 3-hour zodiac trip at 10°C on the water?
- Victoria or Bay of Fundy: which offers the highest sighting probability?
- The approach distance mistake that stresses whales and risks fines
- How to set your shutter speed for breaching whales in choppy water?
- The swimming error that leads to cold water shock in July
- The navigation mistake of paddling without a compass in maritime fog
- How to hike the West Coast Trail without underestimating the mud and tides?
Why are orcas resident in BC while humpbacks migrate to the Atlantic?
Understanding where to see certain whales begins with a simple question: what’s for dinner? A whale’s location is dictated almost entirely by its food source and life cycle. Canada’s vast coastlines offer incredibly diverse marine habitats, which is why the range of observable species is so varied, from the iconic killer whales of British Columbia to the belugas of the Arctic.
The difference between BC’s resident orcas and the Atlantic’s migratory humpbacks is a perfect example. The Southern Resident Killer Whales of the Salish Sea have a highly specialized diet, primarily feeding on Chinook salmon. Since salmon have predictable migration routes and are present in these waters year-round, the orcas don’t need to travel vast distances; they are “resident” because their food stays local. This makes sightings in their core habitat, like the waters around Victoria, relatively predictable.
Humpback whales, on the other hand, are baleen whales that filter-feed on massive quantities of krill and small fish. These food sources are most abundant in the cold, nutrient-rich waters of the North Atlantic (and North Pacific) during the summer. Humpbacks undertake one of the longest migrations of any mammal, travelling from tropical waters like the Caribbean where they breed and calve in winter, to these northern feeding grounds. This is why you see them in places like the Bay of Fundy or off Newfoundland only during the warmer months—they are there for the all-you-can-eat buffet before their long journey south.
How to dress for a 3-hour zodiac trip at 10°C on the water?
The single most important factor for your family’s comfort on a whale watching tour is not the weather, but your clothing. A water temperature of 10°C, combined with wind chill on a moving boat (a phenomenon called convective heat loss), can feel drastically colder than the air temperature suggests. Proper dressing isn’t about fashion; it’s applied science. The goal is a system that traps warm air, blocks wind, and manages moisture.
The enemy here is cotton. When cotton gets wet from spray or sweat, it loses all its insulating properties and actively pulls heat away from your body. This is why a “bio-comfort” approach, focusing on technical fabrics, is essential. Your system should be built in three parts:
- Base Layer: This is your next-to-skin layer. Its only job is to wick moisture away. Choose merino wool or a synthetic material.
- Mid Layer: This is your insulation. A fleece jacket or a compressible down vest traps your body heat. You can add or remove this layer as conditions change.
- Outer Shell: This protects you from the elements. Most Zodiac tour operators provide a full-body flotation suit, which is an excellent waterproof and windproof shell. You wear this over your other layers.
This layered approach ensures that even if you encounter spray and wind, your core temperature remains stable and comfortable. This system is what allows you to focus on the incredible experience, not on how cold you are.

Remember to protect your extremities, where heat loss is fastest. Warm wool socks, waterproof gloves, and a wind-proof tuque (beanie) are non-negotiable. A well-dressed family is a happy family, ready for adventure.
Victoria or Bay of Fundy: which offers the highest sighting probability?
While whales are wild animals with no fixed schedule, certain locations in Canada offer exceptionally high sighting probabilities due to unique geographic and biological factors. Choosing the right spot for your family often involves a trade-off between the likelihood of sightings, the variety of species, and the comfort of the journey. For families, “calm waters” can be just as important as a 95% success rate.
Let’s compare three of Canada’s world-class whale watching hubs. The waters around Victoria, BC, are part of the Salish Sea, which is relatively protected and often calmer than the open ocean—a huge plus for those worried about seasickness. It’s a global hotspot for orcas. In Quebec, the Tadoussac region sits at the confluence of the Saguenay and St. Lawrence rivers, creating an upwelling of nutrients that supports an astonishing 13 different cetacean species, including the endangered St. Lawrence Beluga and the colossal Blue Whale. The Bay of Fundy, famous for the world’s highest tides, offers dramatic scenery and is a critical feeding ground for massive numbers of humpbacks.
This table breaks down the key differences to help you decide what’s best for your family’s priorities.
| Location | Target Species | Peak Season | Sighting Rate | Unique Features |
|---|---|---|---|---|
| Victoria, BC | Orcas (300 residents), Gray whales, Humpbacks | April-November | 90-95% | Calm Salish Sea waters, lifetime sighting guarantees common |
| Bay of Fundy | Humpbacks, Right whales, Fins | June-October | High but variable | World’s highest tides, dramatic conditions |
| Tadoussac, QC | 13 species including Belugas, Blues, Humpbacks | May-October | Very high | Highest species diversity, endangered St. Lawrence Belugas |
While these are the “big three,” it’s worth noting that other areas also offer world-class experiences. For instance, the waters off Newfoundland and Labrador host what Newfoundland and Labrador tourism confirms is the world’s largest population of feeding humpback whales in the summer, often seen right from shore.
The approach distance mistake that stresses whales and risks fines
The most exhilarating moment of a whale watch is a close encounter. However, “close” is a term defined by law and biology, not just by our excitement. The single biggest mistake a boater or paddler can make is getting too close, which causes significant stress to the animals and carries severe legal penalties. This isn’t just a rule; it’s a cornerstone of ethical and sustainable wildlife viewing.
Whales rely on sound to navigate, communicate, and find food. The underwater noise from a boat engine can disrupt these vital behaviours, causing them to stop feeding, change direction, or even abandon their calves. This “acoustic stress” is why Canada’s Marine Mammal Regulations are so strict. As Fisheries and Oceans Canada (DFO) mandates, you must:
Keep at least 100 metres away from whales, dolphins and porpoises · Keep at least 200 metres away from whales, dolphins and porpoises that are resting or with a calf
– Fisheries and Oceans Canada, Marine Mammal Regulations
In British Columbia waters, the rules are even stricter to protect vulnerable populations: a 200m minimum approach distance for all killer whales, extended to 400m for the endangered Southern Resident Killer Whales in their critical habitat. These aren’t suggestions. Fisheries and Oceans Canada warns that violations can result in fines up to $100,000. And these fines are enforced.
Case Study: The First Conviction
To understand the seriousness of these regulations, consider the first conviction under the updated laws. According to a news release from DFO, a tour guide in Prince Rupert, BC, was found guilty of approaching a Humpback whale at a distance of less than 100 metres. He was ordered to pay a fine of $2,000, setting a clear precedent that these approach distances are a hard line, not a soft guideline.
Choosing a certified tour operator ensures you are with a professional who understands and respects these boundaries, allowing for a thrilling encounter that is safe for both you and the whales.
How to set your shutter speed for breaching whales in choppy water?
Capturing the peak moment of a whale breach is the holy grail for any photographer. In the choppy, unpredictable environment of a boat, it’s a challenge that requires more than just luck—it demands an “action-ready” mindset and a specific technical formula. The key is to freeze the explosive motion of a multi-ton animal while compensating for the movement of the boat.
Your camera’s most powerful tool for this is its shutter speed. A slow shutter speed will result in a blurry image, failing to capture the incredible detail of the moment. You need to be fast. A speed of 1/1000th of a second is the absolute minimum, but for the fastest part of a breach, you should aim for 1/1500s or even 1/2000s. To achieve this, you’ll need to balance your other settings. An aperture of f/8 will give you a good depth of field, keeping more of the whale in focus. This often means you’ll have to let your camera’s ISO climb, but modern cameras handle this well.
The secret weapon of experienced marine photographers is not just a setting, but a technique: keep both eyes open. One eye stays in the viewfinder, ready to shoot, while the other scans the water. This allows you to spot the next sign of activity—a blow, a tail fluke, or the dark shape of a whale rising—and be ready to capture it instantly. Setting your camera to high-speed burst mode and continuous autofocus is also critical to track the fast-moving subject.
Action Plan: Your Camera Settings for Breach Photography
- Shutter Speed: Set to Shutter Priority (Tv or S) and start at 1/1000s. Increase to 1/1500s or faster if the light allows.
- Aperture: If shooting in Manual or Aperture Priority, set to f/8 to maximize the zone of sharp focus on the animal.
- ISO: Use Auto ISO, but set a maximum cap (e.g., 3200 or 6400) to control image noise.
- Focus & Drive: Select Continuous Autofocus (AF-C/AI-Servo) and High-Speed Continuous (Burst) shooting mode.
- Technique: Pre-focus on the water’s surface where you anticipate action and keep both eyes open to scan the area.
By preparing your gear and your mind, you transform from a passive spectator into an active participant, ready to capture that once-in-a-lifetime shot.
The swimming error that leads to cold water shock in July
Canada’s coastal waters are breathtakingly beautiful, but they are also deceptively dangerous. Even on a warm July day, the water temperature remains shockingly cold. Jumping in for a swim without acclimatization is a critical error that can trigger a deadly physiological response known as cold water shock. This is not hypothermia, which takes time to develop; it’s an immediate, involuntary gasp reflex that can cause you to inhale water and drown instantly.
Water temperatures in popular coastal areas like Tofino, BC, or the coast of Nova Scotia can hover around 14-15°C in mid-summer. This is far below the temperature your body is prepared for. The sudden immersion triggers an uncontrollable gasp for air, followed by hyperventilation. Your heart rate and blood pressure skyrocket, which can lead to cardiac arrest, even in young, healthy individuals.
Canadian search and rescue professionals teach the life-saving 1-10-1 Principle to explain the stages of cold water immersion. It’s a critical piece of knowledge for anyone venturing near our cold oceans:
- 1 Minute: You have about one minute to get your breathing under control after the initial shock. Fight the panic and focus on not inhaling water.
- 10 Minutes: You have approximately ten minutes of meaningful, useful movement before your muscles become too cold to function. This is your window for self-rescue.
- 1 Hour: It can take up to an hour before you lose consciousness due to hypothermia. If you can’t get out, the goal is to conserve energy and heat while waiting for rescue.
Never underestimate the power of cold water. Any activity that involves a risk of falling in, from kayaking to paddleboarding, requires a lifejacket or PFD. It will keep you afloat during that critical first minute of shock, giving you a chance to control your breathing and survive.
The navigation mistake of paddling without a compass in maritime fog
The serene beauty of paddling along the Canadian coast can change in an instant. Maritime fog can roll in with surprising speed, reducing visibility to just a few feet and completely erasing the shoreline. In these conditions, your internal sense of direction is useless. The most dangerous mistake a paddler can make is to rely on it, or to depend solely on a smartphone for navigation. A dead battery or lack of cell service can leave you dangerously disoriented.
Safe coastal navigation is about building a redundant, multi-layered system. It’s a mindset that assumes one piece of equipment might fail and always has a backup. Technology is a fantastic aid, but it should never be your primary tool. The foundation of your system must be analog and reliable.
A complete navigation system for coastal paddling in Canada should include:
- Primary Tool – Physical Compass: A simple, deck-mounted compass is your most reliable instrument. Before your trip, you must know how to take a bearing from your map to the shore and follow it in zero visibility. This is a fundamental skill, not an optional extra.
- Secondary Tool – GPS/Offline Maps: A dedicated GPS unit or a smartphone with pre-downloaded offline maps (like Navionics) is an excellent secondary tool. It can confirm your position quickly but should never be your only option.
- Audible Signal: In thick fog, sound is as important as sight. A powerful, pea-less whistle or a marine air horn is essential for signaling your position to other vessels to avoid a collision.
- Emergency Communication: A waterproof VHF marine radio allows you to contact the Canadian Coast Guard on Channel 16 in a true emergency. It is a vital piece of safety equipment for any serious coastal trip.
Paddling without a compass and the knowledge to use it is like driving a car at night without headlights. It’s a gamble you should never take.
Key Takeaways
- Effective layering for cold water is a science; choose wicking synthetics or wool, never cotton, to manage moisture and prevent heat loss.
- Respecting legal approach distances (100-400m) is a non-negotiable part of ethical tourism that protects whales from acoustic stress and avoids massive fines.
- Your family’s ideal whale watching location depends on your priorities: choose Victoria for calm waters and orcas, or Tadoussac for the highest species diversity.
How to hike the West Coast Trail without underestimating the mud and tides?
The principles of thorough preparation and respect for the environment are not limited to the water. On land, Canada’s iconic coastal hikes, like British Columbia’s West Coast Trail (WCT), demand the same level of foresight. Many hikers arrive prepared for a scenic walk, only to be defeated by the trail’s two most formidable challenges: the infamous mud and the unforgiving tides. Underestimating them is the most common mistake hikers make.
Success on the WCT requires a system-based approach to gear and planning. It’s not about having one good piece of equipment, but about how your boots, gaiters, and poles work together. The trail is legendary for its deep, shoe-swallowing mud pits. High-cuffed, waterproof hiking boots are a start, but they are incomplete without knee-high gaiters to prevent mud from pouring in over the top. Trekking poles provide crucial stability on slippery logs and slick rock shelves, turning a treacherous crossing into a manageable one.
Even more critical is your relationship with the tides. Several headlands along the WCT are completely impassable at high tide, trapping hikers and forcing them into dangerous overland routes. Simply carrying a tide chart is not enough; you must know how to read it and plan your days around its rhythm. For example, the notorious Owen Point is only passable when the tide is below 2.7 metres. This requires precise calculation.
- First, identify the impassable headlands on your Parks Canada map.
- Next, check the required maximum tide height for safe passage for each one.
- Then, consult your tide tables to find the time and height of low tide for that day.
- Calculate your safe passage window, which is typically 1.5 hours before and after the peak low tide.
- Finally, build buffer time into your itinerary for potential delays from storms or unexpectedly high tides.
Just as on the water, you are a guest in a powerful, dynamic environment. Success and safety come from understanding its rules and planning accordingly.
Now that you are equipped with this expert knowledge, the next step is to explore the certified local operators and guides who share this deep commitment to conservation, safety, and education. They are your best partners in creating a family adventure that is as enlightening as it is unforgettable.