In summary:
- Cross-country skiing is a high-output sport burning 500-900 calories/hour, requiring a different approach to clothing than downhill skiing.
- Mastering the “sweat and freeze” cycle is about managing your body’s microclimate with a three-layer system, not wearing a heavy jacket.
- Effective waxing depends on “reading the snow” (crystal shape and moisture), not just the air temperature.
- Klister wax is for old, transformed, wet snow, while hard wax is for new, cold, sharp-crystalled snow.
- Canada offers diverse trail networks, from concentrated Western resorts to linear Eastern trails connecting communities.
For anyone transitioning from the stop-and-start rhythm of downhill skiing to the continuous effort of cross-country, the Canadian winter presents a unique set of challenges. It’s a landscape of breathtaking beauty, but also of wildly fluctuating conditions. Many new Nordic skiers focus on the obvious: what the thermometer says. They pack heavy parkas and apply the wax colour that matches the forecast, only to find themselves either sweating profusely on a climb or losing all grip as the sun warms the tracks. This often leads to the frustrating “sweat and freeze” cycle and skis that feel like they’re covered in sandpaper or sticky glue.
The common advice to “dress in layers” or “check the temperature” is not wrong, but it’s incomplete. It misses the two fundamental secrets that passionate Nordic skiers live by. First, you aren’t dressing for the cold; you’re dressing to manage the intense heat your body will generate. Second, you aren’t waxing for the air; you are waxing for the snow itself—a dynamic, ever-changing surface with its own history and personality. This is the essence of the glide vs. grip dialectic, a balance that turns a simple winter outing into a sublime experience.
This guide moves beyond the basics. As an instructor who spends my winters on the trails of the Laurentians, I’ll show you how to think differently. We will explore how to manage your body’s microclimate, how to read the story of the snow to make the right wax choice, and how to select the right gear and trails to truly embrace the adventure of Nordic skiing in Canada. We’ll even see how these principles of thermal management apply to other unique Canadian winter experiences, from navigating Toronto’s underground city to sleeping in Quebec’s famous Hôtel de Glace.
This article provides a complete framework for understanding the unique demands of Nordic skiing in Canada. The following sections break down everything from the sport’s physiological demands to the specific techniques for staying warm and achieving the perfect glide.
Summary: Mastering Your Glide in the Canadian Winter
- Why Does Cross-Country Skiing Burn More Calories Than Almost Any Other Winter Sport?
- How to Choose the Right Style for Your Fitness Level and Local Trails?
- Western Powder or Eastern Technical Trails: Which Offers the Best Extensive Network?
- The “Sweat and Freeze” Error Beginners Make with Heavy Jackets
- When to Switch to Klister Wax vs. Hard Wax?
- The Winter Error That Ruins a Walking Tour of the Toronto PATH System
- Why Does a Mummy Bag Keep You Warm Even if You Sleep Naked?
- How to Sleep Comfortably in Quebec’s Hôtel de Glace When the Room Is -5°C?
Why Does Cross-Country Skiing Burn More Calories Than Almost Any Other Winter Sport?
The first thing new Nordic skiers discover is just how much of a workout it is. Unlike alpine skiing, which involves short bursts of energy followed by long rests on a chairlift, cross-country skiing is an engine of perpetual motion. You are the engine. This continuous, full-body engagement—pushing with your legs, poling with your arms and core—creates a sustained cardiovascular demand that is almost unrivaled in winter sports. It’s not just anecdotal; research shows that cross-country skiers burn between 500 and 900 calories per hour on average.
To put that in perspective, a downhill skier burns roughly 360 to 482 calories in the same amount of time. The difference is the lack of breaks and the total muscle recruitment. Elite cross-country skiers can even burn upwards of 1300 calories in a single hour of intense racing. This high energy expenditure is the reason why managing your layers and nutrition is so critical. You’re not just staying warm; you’re fueling a furnace.
Several factors can push that calorie burn even higher, turning a pleasant glide into a serious athletic endeavor. To maximize your workout, you can focus on:
- Technique: The skating or “freestyle” technique has been shown to use up to 21% more energy than the traditional classic style.
- Terrain: Skiing on flat, groomed terrain is a great workout, but tackling rolling hills will elevate your calorie burn into the 700-900 per hour range.
- Conditions: Navigating variable Canadian snow, from fresh powder to icy patches, forces your stabilizer muscles to work overtime, further increasing energy use.
- Thermogenesis: Just being out in cold Canadian conditions, especially between -15°C and -25°C, requires your body to burn extra calories simply to maintain its core temperature.
Understanding this massive energy output is the first step to enjoying the sport. It dictates what you wear, what you eat, and how you approach your time on the trails. It is a true full-body winter workout.
How to Choose the Right Style for Your Fitness Level and Local Trails?
Once you appreciate the athletic nature of the sport, the next question is which style to pursue: classic or skate. This choice is less about which is “better” and more about what kind of experience you’re looking for and what trails are available to you in your part of Canada. Think of it as the difference between being a hiker and a speed skater—both are great, but they require different gear and terrain.
Classic skiing is the traditional style, performed in machine-set parallel tracks. The motion is a diagonal stride, similar to walking or running, involving a “kick and glide” sequence. It’s generally easier for beginners to pick up, more relaxed, and can be done on a wider variety of trails, including those that are only lightly groomed. It’s the perfect way to explore a quiet forest trail. Skate skiing, or freestyle, is a newer, faster technique that resembles ice skating. It requires a wide, firmly-groomed trail (often called a “skate lane”) and is more physically demanding, requiring balance and a high level of fitness. It’s an exhilarating, high-speed workout.
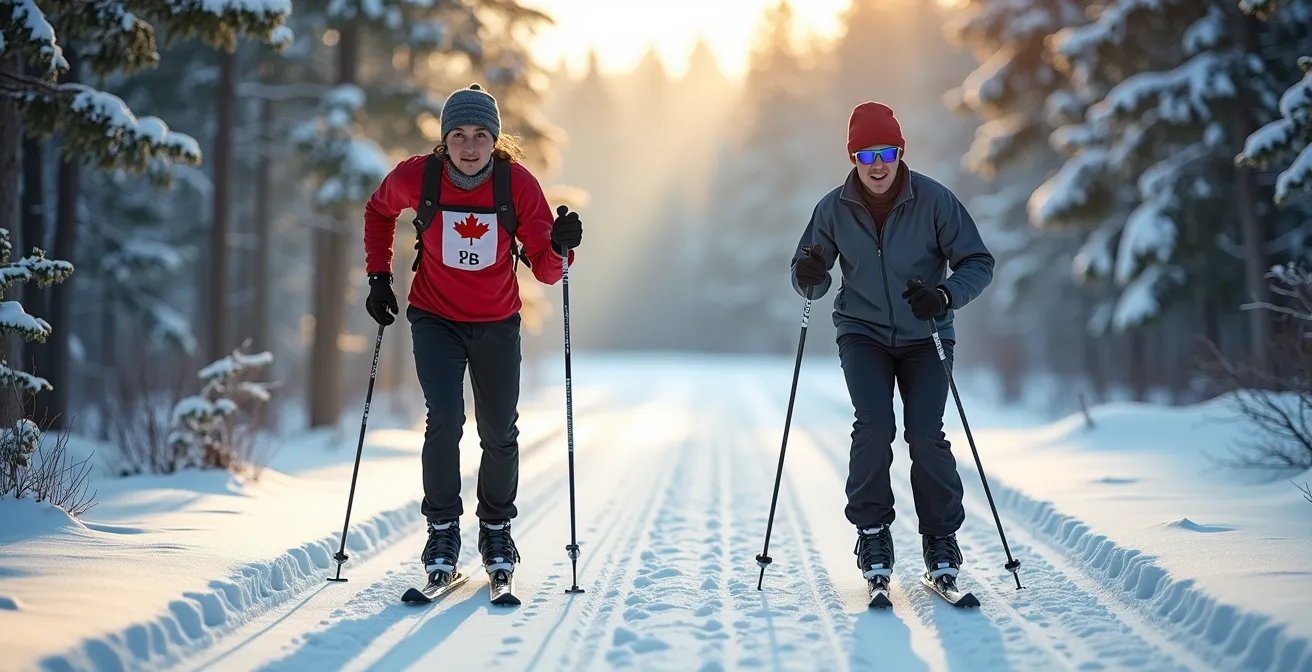
As you can see, the two styles demand different body positions and trail types. Your choice will depend on your goals. If you’re coming to the sport for fitness and have access to a network like Ottawa’s Gatineau Park or Canmore’s Nordic Centre, skate skiing is a fantastic option. If you’re more interested in scenic, peaceful tours and have local conservation areas or municipal parks with simple tracks, classic is your gateway to winter adventure. Many skiers, especially in Canada, end up doing both, choosing their style based on the day’s conditions and mood.
Western Powder or Eastern Technical Trails: Which Offers the Best Extensive Network?
Canada is blessed with an incredible variety of Nordic ski trails, but their character differs dramatically from east to west. The term “extensive network” can mean two very different things depending on where you are. Understanding this difference is key to planning your ski adventures. It’s not just about total kilometers, but about the trail’s personality.
As the Canadian Cross-Country Ski Association notes in their National Trail Network Analysis, there’s a distinct pattern in how our trail systems are developed. This insight is crucial for visiting skiers:
Western networks are often concentrated destinations, whereas Eastern Canada offers more trails that can be accessed directly from towns and cities.
– Canadian Cross-Country Ski Association, National Trail Network Analysis
This observation highlights the two philosophies of trail design in Canada. In the West, you find world-class destination resorts. In the East, you find historic trails that are woven into the fabric of the community. Neither is superior; they simply offer different kinds of adventures.
Case Study: Sovereign Lake/SilverStar (BC) vs. The Jackrabbit Trail (QC)
This contrast is perfectly illustrated by comparing two of Canada’s most famous networks. The combined Sovereign Lake and SilverStar Mountain Resort network in British Columbia’s Okanagan Valley offers over 150 kilometers of interconnected, impeccably groomed trails. It’s a “ski destination” in the truest sense, where you can spend days exploring a vast, concentrated area from a central hub, ideal for a focused ski holiday. In contrast, the legendary Jackrabbit Trail in Quebec’s Laurentians is a 200-kilometer linear route that connects multiple towns and communities. Named after the legendary Herman “Jackrabbit” Smith-Johannsen, it offers a point-to-point wilderness journey, a historical pilgrimage through the heart of Canadian ski country. One is a spiderweb, the other is a lifeline.
So, which is “best”? It depends on your goal. For a resort-style vacation with guaranteed grooming and every amenity, the concentrated networks of the West are hard to beat. For a more rustic, journey-focused experience that feels like a true expedition, the historic linear trails of the East offer a unique connection to the landscape and its history.
The “Sweat and Freeze” Error Beginners Make with Heavy Jackets
I see this mistake constantly on the trails: a new skier, red-faced and sweating profusely, wearing a bulky, insulated downhill ski jacket. Ten minutes later, after stopping for a drink, they’re shivering. This is the classic “sweat and freeze” cycle, and it’s the fastest way to ruin a day of Nordic skiing. The cause is a misunderstanding of thermal regulation during high-output activity. You are a furnace, and that heavy jacket is trapping all the steam.
The solution is not more insulation, but smarter microclimate management. This means dressing in a flexible three-layer system that allows you to vent heat and manage moisture effectively. Cotton is your enemy; it gets wet and stays wet, chilling you to the bone. Your system should be built on performance fabrics designed for this purpose.
The ideal Canadian layering system is adaptable to everything from a frigid prairie wind to a surprisingly warm sun-drenched day in the mountains. Here’s how to build it:
- Base Layer: Start with a snug-fitting merino wool or synthetic base layer. Its job is not primarily warmth, but to wick sweat away from your skin to keep you dry.
- Mid-Layer: This is your insulation layer. A light fleece or a highly packable down vest/jacket is perfect. This is the layer you’ll often take off and put in your pack during a hard climb.
- Outer Layer (Shell): Your final layer should be a lightweight, windproof, and water-resistant shell jacket and pants. This protects you from the elements without trapping moisture. For skiing on the windswept prairies, a good windproof shell is non-negotiable.
The art of layering is being proactive. Remove a layer *before* a big climb, like those you find in Gatineau Park, to prevent overheating. Put it back on before a long, fast descent or when you stop for a break. Your core temperature is the priority; if your torso gets cold, your body will reduce blood flow to your hands and feet, making them feel frozen no matter how good your gloves are.
When to Switch to Klister Wax vs. Hard Wax?
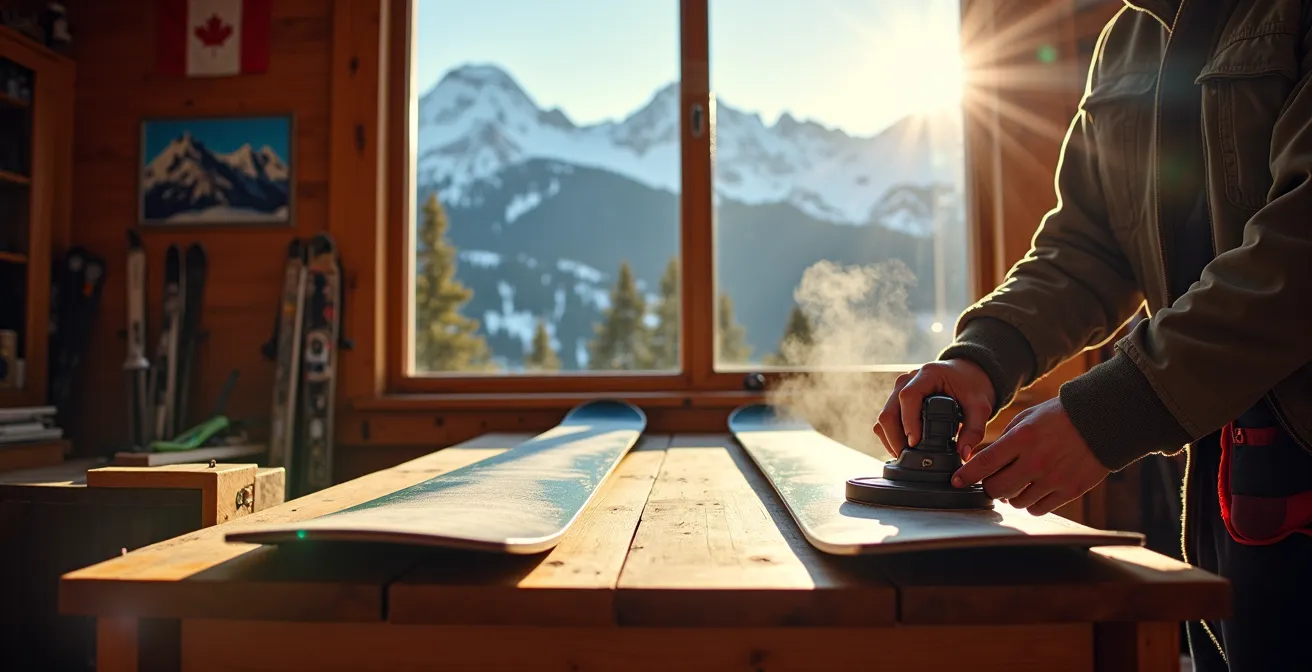
If layering is the key to personal comfort, waxing is the key to your skis’ performance. For classic skiing, this is a constant negotiation between two opposing forces: grip (or “kick”) and glide. The wrong wax can leave you either slipping backward on every hill or feeling like you’re dragging an anchor. Many beginners rely solely on the air temperature, but the real secret is learning to read the snow. This is the art of snow metamorphosis.
Fresh, cold snow is made of sharp, pointy crystals. For this, you use hard wax. You apply a thin layer in the “kick zone” under your foot, and these sharp crystals dig into it, giving you grip when you push off. When you glide, your weight is distributed, and the wax slides smoothly over the snow. But as snow ages, melts, and refreezes, those crystals become rounded, old, and granular—like grains of salt or corn snow. Hard wax can’t grip these rounded crystals. This is when you need klister, a sticky, glue-like gel. Klister works by adhering to these old, wet snow crystals, providing the grip that hard wax can no longer offer.
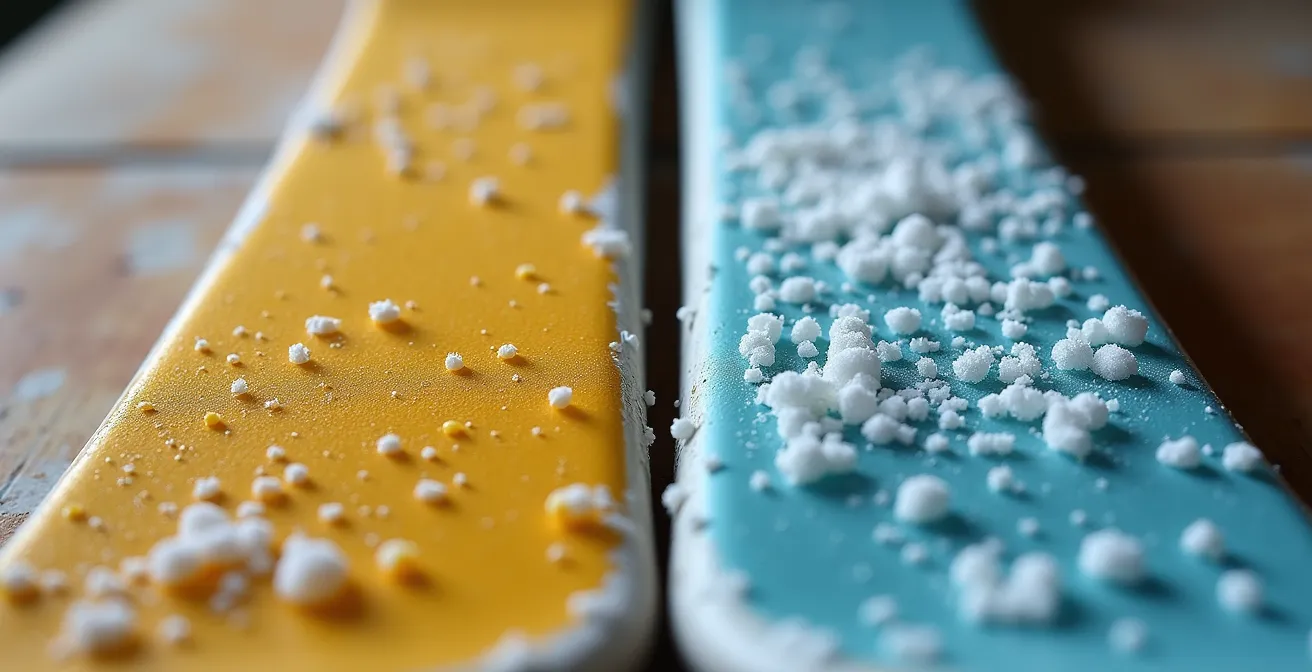
The visual difference is stark, as is the feeling on the snow. A classic Southern Ontario spring scenario perfectly illustrates this. You might start a ski in the morning on frozen, glazed tracks where a hard klister is perfect. As the March sun warms the snow to near 0°C, it becomes wet and slushy. At this point, the snow crystals are thoroughly rounded with high water content—prime conditions for a warmer, softer klister. Conversely, a sudden cold snap in Quebec can drop fresh, sharp-crystalled snow on top of an old base, meaning a hard wax is the right call, even if the temperature is close to freezing. Your eyes are your best tool: look at the snow. Is it sharp and new, or old and rounded?
The Winter Error That Ruins a Walking Tour of the Toronto PATH System
The principle of microclimate management isn’t just for the ski trails; it’s essential for navigating any Canadian winter experience, even in the heart of our biggest city. A perfect example is a walking tour of Toronto’s PATH system, the massive underground network of shops and tunnels. Tourists often make the same mistake as novice skiers: they dress for the weather outside.
They arrive bundled in a heavy parka, hat, and gloves, ready for a Toronto winter. The moment they step inside the PATH, they are hit with a wall of heat. As Toronto winter visitors report that “indoor spaces are very well heated (over heated in some instances).” The result is a miserable experience, sweating in a crowded tunnel while lugging a bulky coat. You’re no longer exploring a unique urban wonder; you’re just trying to find a place to cool down.
Avoiding this common travel mistake means applying the same layering logic you’d use on the ski trail. You need a system that can handle a rapid transition from -10°C outside to +22°C inside. Overdressing is the single biggest error that can ruin your tour.
Your Action Plan: Navigating the PATH System Like a Local
- Assess Your Layers: Wear a short-sleeve or light long-sleeve base layer under a mid-layer (like a sweater or fleece) and an outer coat. Your outer coat should be packable, or you should plan to use a coat check service at a major entry point like a mall or hotel.
- Get the Right Map: Don’t rely on street-level GPS; it won’t work underground. Download a PATH-specific navigation app to your phone *before* you enter the system to avoid getting lost.
- Check the Hours: The PATH is not a 24/7 system. Many sections, especially in office-only towers, close in the evenings and on weekends. Plan your route and check operating hours in advance.
- Respect the Environment: The PATH is a clean, dry, indoor space. Commuters appreciate it when visitors bring a change of clean indoor shoes or use boot covers to avoid tracking in slush and salt.
- Plan for Transitions: Your goal is to be comfortable both indoors and out. A system of easily removable layers is far superior to one heavy, monolithic parka.
Why Does a Mummy Bag Keep You Warm Even if You Sleep Naked?
The concept of managing your environment for thermal comfort extends to another classic Canadian winter question: how do sleeping bags actually work? Many people believe a sleeping bag *creates* heat, or that wearing more clothes inside it will always make you warmer. This isn’t quite right. The secret is thermal trapping.
A sleeping bag, particularly an efficient mummy-style bag, is an expert at trapping a layer of still air. Your body is the furnace; it constantly generates heat. The bag’s insulation (whether down or synthetic) simply prevents that precious warm air from escaping. This is why a snug-fitting mummy bag is warmer than a roomy rectangular one—there’s less dead air space for your body to heat up. In theory, this is why you can sleep naked in a good bag and stay warm: your body heats the trapped air, and the bag holds it close to you.
However, theory meets a harsh reality in the cold: moisture. Sweat is the enemy of warmth. If you sweat while you sleep, that moisture will cool you down much faster than the air temperature. This leads to a crucial, counter-intuitive point about sleeping in the cold, as noted by experts.
A dry, wicking base layer like merino wool is often superior to sleeping naked because it manages moisture (sweat), which is the primary cause of heat loss.
– Outdoor Gear Lab, Winter Camping Thermal Studies
So, while the bag works by trapping your body’s radiant heat, the most effective system involves managing the moisture your body produces. Sleeping in a clean, dry set of merino wool or synthetic long underwear helps wick that moisture away from your skin, keeping the entire system of you, your microclimate, and your bag dry and efficient. Sleeping in the clothes you wore all day, which are full of moisture and dirt, is a recipe for a cold night.
Key Takeaways
- Effective winter comfort comes from managing moisture and body heat (your “microclimate”), not just piling on insulation.
- Waxing for classic skiing is about reading the snow’s crystal structure (metamorphosis), not just the air temperature.
- Canada’s diverse cross-country ski networks offer two distinct experiences: concentrated resort-style destinations in the West and linear, community-integrated journey trails in the East.
How to Sleep Comfortably in Quebec’s Hôtel de Glace When the Room Is -5°C?
There is perhaps no greater test of trusting a thermal system than a night at Quebec’s famous Hôtel de Glace. The idea of sleeping in a room carved entirely from ice, where the ambient temperature hovers around -5°C, can be intimidating. But thousands of guests do it comfortably every year. The secret, much like with Nordic skiing and winter camping, is not to fight the cold, but to use the right system and technique.
The hotel provides guests with expedition-grade Nordic sleeping bags rated for temperatures as low as -30°C. Your bed is a block of ice, but it’s topped with a solid wood frame and a thick, insulating mattress. You are never in direct contact with the ice. Success comes from trusting this purpose-built system and preparing your body correctly. As one experienced guest explained, the mental challenge is often greater than the physical one.
The secret is trusting their system – the Nordic sleeping bags provided are rated to -30°C and there’s an insulating layer between you and the ice bed. Most guests are surprised how warm they stay. The biggest challenge isn’t cold but the midnight bathroom run – that’s why keeping warm clothes within arm’s reach is crucial.
– Guest at Hôtel de Glace
To ensure a warm and memorable night, staff give a mandatory briefing on exactly how to use the equipment. The strategies shared by repeat guests all revolve around a few key principles of heat management:
- Pre-warm your body: Use the outdoor hot tubs or sauna immediately before heading to your room. This raises your core body temperature, turning you into a powerful furnace to heat your sleeping bag.
- Trap the heat quickly: Don’t linger in the cold room. Get into your sleeping bag quickly after the hot tub and zip it up immediately to trap all that wonderful warm air inside.
- Stay dry: Just like on the ski trail, moisture is your enemy. Always change into a set of dry thermal base layers to sleep in. Never sleep in the clothes you wore during the day.
- Plan for emergencies: The “midnight bathroom run” is the moment of greatest thermal risk. Keep your slippers, hat, and a warm jacket right beside the bed so you can get there and back with minimal heat loss.
- Protect your gear: Electronics like phones will have their batteries die almost instantly in the cold. Keep them, along with any water bottles, in the designated heated areas overnight.
An overnight stay at the Hôtel de Glace is a perfect final lesson in Canadian winter survival: with the right knowledge and the right gear, you can not only survive but thrive in conditions that seem impossible.
The journey into Nordic skiing is one of the most rewarding ways to experience the Canadian winter. The next step isn’t to buy more gear, but to take these principles out onto the snow. Start experimenting with your layers, pay attention to the changing snow conditions, and begin building your own on-trail experience. Enjoy the glide!