True Canadian wilderness readiness isn’t about cardio; it’s a stark calculation of your ability to handle specific, non-negotiable environmental and financial risks.
- The physical demand goes beyond simple hiking, involving carrying heavy loads for days and preparing for severe, sustained elevation gain.
- The financial consequences of a remote rescue are significant, and standard travel insurance offers almost no protection in the backcountry.
Recommendation: Assess your fitness against the precise demands of your chosen trail—not a generic standard—and train for contingency, not just completion.
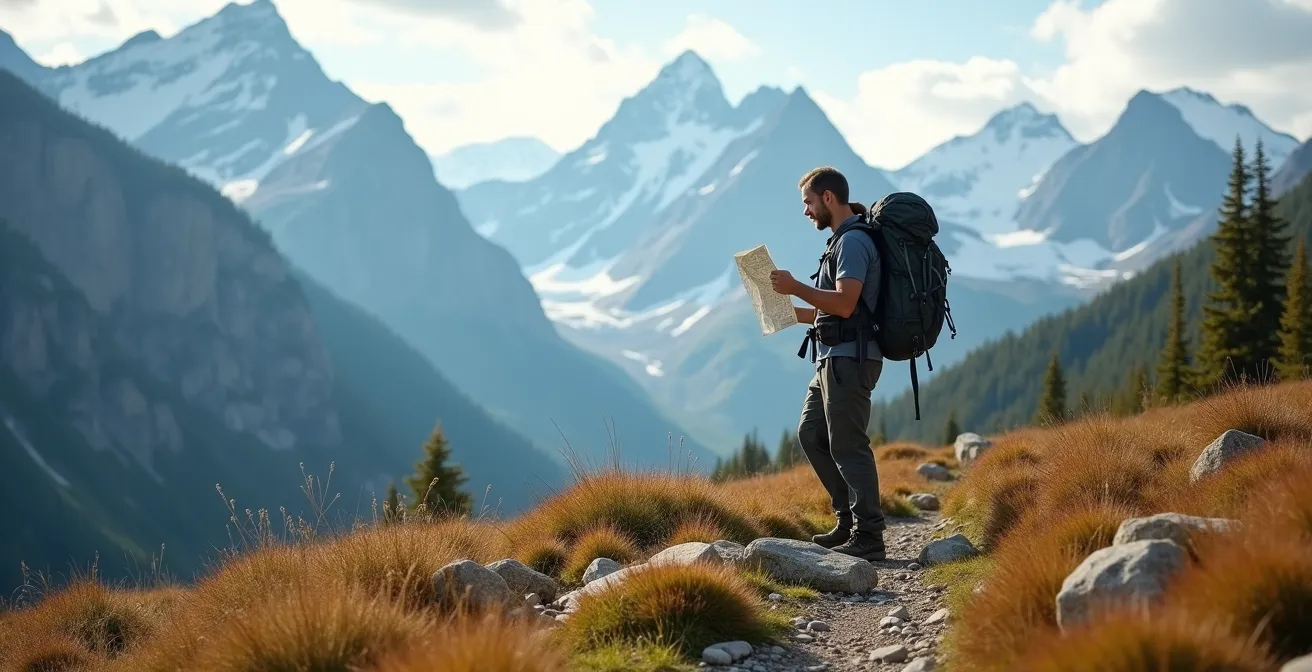
The image of a pristine Canadian lake, tent pitched perfectly at the water’s edge, is a powerful lure for active travellers. You’re fit, you exercise regularly, and you’re ready for an adventure. But the gap between being “in shape” and being prepared for a multi-day, self-supported trip into the Canadian backcountry is vast and fraught with underestimated risks. Many assume that good cardio and a new backpack are sufficient preparation. They focus on the destination, not the severe physical and mental toll of the journey itself.
This assessment is not about discouraging you. It is about shifting your perspective from abstract fitness metrics to a concrete readiness equation. The real question isn’t “Am I fit?” but rather, “Is my fitness matched to the specific environmental stressors of this route?” We will dismantle the common assumptions and provide a frank, safety-oriented framework. You will learn to evaluate the true weight of your pack, the psychological strain of genuine isolation, the staggering financial risk of a remote rescue, and how to train for the specific, brutal demands of iconic Canadian trails.
This guide provides a structured reality check. By understanding the true nature of the challenges ahead, you can make an informed decision about your capabilities, choose the right trip for your level, and train with purpose. This is how you transform a potentially dangerous gamble into a successful and deeply rewarding wilderness experience.
Summary: A frank assessment of your Canadian wilderness readiness
- Paying for a guide or going solo: which is safer for your skill level in the backcountry?
- What does it really mean to carry 50lbs of gear for 10 days?
- Why does standard travel insurance exclude backcountry skiing and climbing?
- The psychological impact of not seeing another human for 5 days
- When to plan a canoe trip to avoid the peak black fly season in Ontario?
- Plain of Six Glaciers or Berg Lake: which requires more logistical prep?
- Heli-rescue vs. Ambulance: understanding the $10,000 difference if you get hurt remotely
- How to train for the elevation gain of the West Coast Trail or Skyline Trail?
Paying for a guide or going solo: which is safer for your skill level in the backcountry?
The first critical decision in your fitness assessment is whether your skills justify a solo or unguided trip. This isn’t a question of ego, but of safety and self-sufficiency. A professional guide doesn’t just show you the way; they carry the mental load of navigation, risk management, and emergency response. Going solo means you must possess this expertise yourself. The Canadian wilderness is not a place for on-the-job training. An honest evaluation of your abilities in navigation, first aid, and gear repair is your primary fitness test. A mistake in a remote setting has consequences far greater than in a local park.
The risks are not theoretical. For example, on one of Canada’s most famous routes, an average of 60-80 hikers annually require evacuation from the backcountry, according to Parks Canada’s West Coast Trail safety statistics. These incidents often stem from a mismatch between a hiker’s skill level and the trail’s demands. Choosing a guide, especially on your first major Canadian expedition, is a sign of mature risk assessment, not weakness. It allows you to learn the specific nuances of the environment—from river crossing techniques to wildlife protocols—under expert supervision.
If you do hire a guide, your responsibility shifts to vetting them properly. A qualified Canadian guide is more than a friendly companion; they are a certified professional. Ensure they are licensed for the specific park (Parks Canada or provincial), hold relevant certifications like those from the Association of Canadian Mountain Guides (ACMG), and can provide a clear emergency action plan. A competent guide service acts as your safety net, but your own physical and mental preparation remains your personal responsibility.
What does it really mean to carry 50lbs of gear for 10 days?
The abstract number “50 pounds” fails to convey the crushing reality of carrying that weight up a mountain pass or through a muddy trail, day after day. This isn’t a single deadlift in a gym; it’s a sustained, body-breaking load that fundamentally changes your biomechanics and energy expenditure. Your centre of gravity shifts, placing immense strain on your knees, ankles, and core stabilizers. The simple act of walking becomes a full-body workout, and a minor stumble can easily lead to a serious fall. Fitness experts calculate that carrying a heavy pack can add 1500-2500 additional calories burned daily, a massive energy deficit you must account for in your food planning.
This paragraph introduces the visual reality of the gear you’ll carry. The image below breaks down the typical weight distribution for a self-supported Canadian wilderness trip.
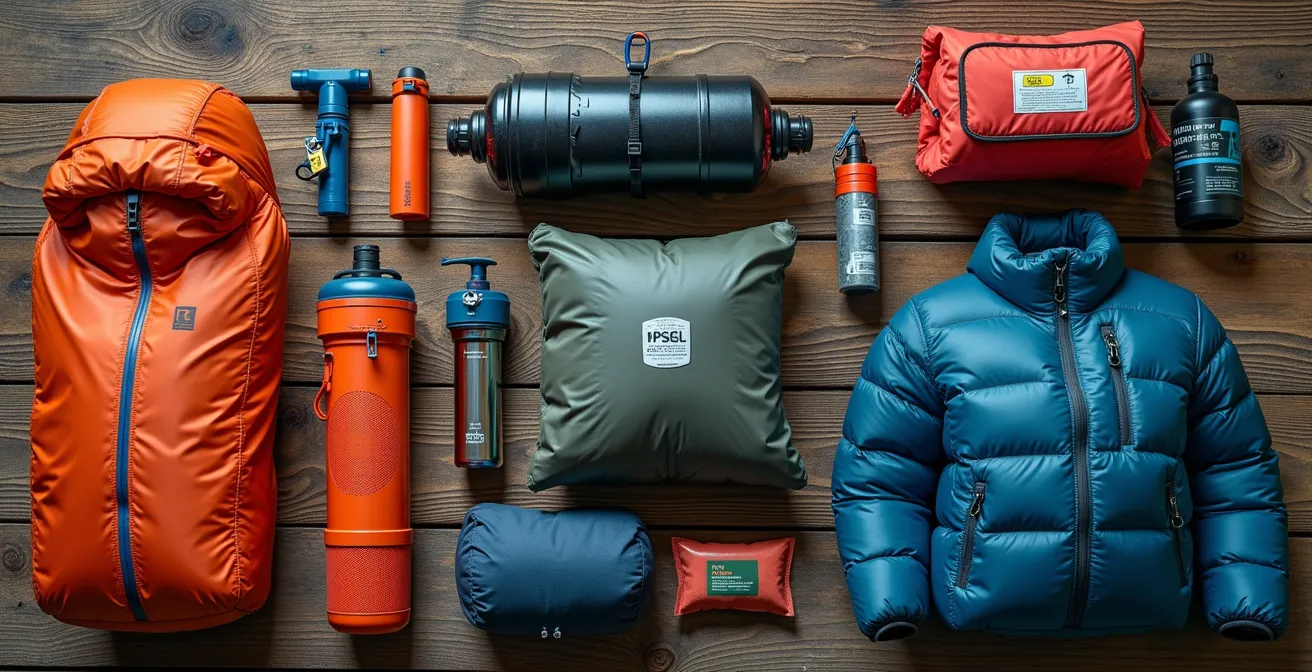
As this layout shows, much of this weight is non-negotiable. Your tent, sleeping system, cooking gear, and, most critically, your bear-proof food container and multiple days of food make up a significant base weight. Furthermore, the weight is not static. Your pack may be lighter as you consume food, but it can become heavier after a rainstorm soaks your gear. True pack-weight fitness means being able to manage this load not when you are fresh, but on day seven, in the rain, with sore muscles. The difference in gear requirements across Canada is also significant. The Akshayuk Pass in Nunavut requires a 50lb+ pack for a self-supported 105km trek, while the Mantario Trail in Manitoba, with its abundant water sources, might allow for a 35-40lb pack for a similar duration, demonstrating how regional realities dictate your load.
Why does standard travel insurance exclude backcountry skiing and climbing?
One of the most overlooked aspects of wilderness fitness is financial readiness for an emergency. Many travellers assume their standard travel insurance policy has them covered. This is a dangerous and costly mistake. The vast majority of these policies contain explicit exclusion clauses for activities deemed “high-risk,” which almost always includes backcountry travel, skiing, mountaineering, and even multi-day trekking on remote trails. The insurer’s definition of “adventure” is a legal tripwire. They are insuring you for a sprained ankle in downtown Vancouver, not a helicopter evacuation from a remote glacier.
The solution is specialized adventure insurance, which comes at a higher cost because it is designed to cover the unique and expensive realities of a wilderness rescue. As the following table shows, the difference in coverage is stark.
| Coverage Type | Cost | What’s Covered | What’s Not Covered |
|---|---|---|---|
| Standard Travel Insurance | $50-100/week | Medical emergencies, trip cancellation | Backcountry rescue, extreme sports, SAR evacuation |
| Adventure Add-on | $150-250/week | Wilderness rescue, heli-evacuation, extreme sports | Solo climbing above 4000m, professional guiding |
| Potential Rescue Cost Without Insurance | $10,000-15,000 | N/A | Full evacuation costs your responsibility |
Understanding this distinction is critical. Furthermore, a common misconception exists around Canada’s volunteer Search and Rescue (SAR) services. As the BC Search and Rescue Association clarifies in their guidelines:
While organizations like BCSARA don’t charge for the rescue itself, you could still be billed for ambulance or air ambulance transportation from the trailhead to hospital.
– BC Search and Rescue Association, Provincial SAR Organization Guidelines
This is the “rescue tax”—the gap between being found by SAR and being transported to medical care. That transportation, especially by air, is where the five-figure bills originate. Your fitness assessment must include confirming you have adequate insurance coverage for your specific planned activities.
The psychological impact of not seeing another human for 5 days
Physical endurance is only one part of the readiness equation. The psychological fortitude required to handle true isolation is a form of fitness that is often completely neglected in training. Spending five or more days without seeing another person is not a peaceful meditation for most people; it’s a significant mental stressor. Small anxieties can amplify in the silence. Every strange noise at night, every moment of navigational uncertainty, every day of persistent rain weighs on your morale. Without the distraction of daily life or the support of a group, you are left alone with your thoughts and the immense, indifferent wilderness.
This mental load is compounded by region-specific environmental stressors. For instance, Parks Canada research highlights that the constant vigilance required in grizzly bear territory creates a unique psychological burden, especially for those unfamiliar with it. The need to constantly make noise, manage food scents with absolute precision, and scan your surroundings adds a layer of mental exhaustion that is separate from physical fatigue. This stress is different in the dense forests of British Columbia, where visibility is low, compared to the open tundra of Nunavut, where the vast emptiness presents its own set of psychological challenges.
Preparing for this requires deliberate practice. You must build your “mental fortitude toolkit” before your trip. This includes testing your comfort with solitude on shorter, local trips and developing routines and micro-goals to maintain a sense of purpose and structure each day. The ability to remain calm, rational, and methodical when you are tired, wet, and completely alone is arguably the most advanced skill in the backcountry. It is a muscle that must be trained with the same discipline as your legs and lungs.
When to plan a canoe trip to avoid the peak black fly season in Ontario?
A classic Canadian wilderness experience is a canoe trip through the lakes of Ontario, but this dream can quickly turn into a nightmare if you misjudge the timing. One of the most severe environmental stressors in this region isn’t bears or rapids; it’s the biblical swarms of biting insects. The peak season for black flies and mosquitoes can make life utterly miserable, turning serene campsites into zones of torment and making it impossible to enjoy moments of rest. Your fitness for this type of trip is directly tied to your tolerance and preparation for this onslaught.
Avoiding the worst of the bugs is a matter of strategic planning, not toughness. The “Paddler’s Pest Calendar” for Northern Ontario is an essential tool for any trip planner. As the data shows, there are distinct windows where the experience is vastly more enjoyable.
| Pest Type | Peak Season | Worst Locations | Avoidance Strategy |
|---|---|---|---|
| Black Flies | Late May – July | Rivers, moving water areas | Choose large windy lakes over rivers |
| Mosquitoes | June – August | Marshes, still water | Camp on exposed points, avoid lowlands |
| Deer/Horse Flies | July – September | Forest edges, sunny spots | Travel early morning or evening |
| Best Windows | Before Victoria Day or after Labour Day | All areas improved | Plan trips in shoulder seasons |
Based on this data, provided by sources like Ontario Parks, a tiered strategy emerges. The best defence is timing: planning your trip for the shoulder seasons, specifically before Victoria Day in late May or after Labour Day in September. If your schedule is fixed for peak summer, your strategy must shift to route and campsite selection. Choosing large, windswept lakes like those in Killarney Provincial Park over sheltered, marshy river systems can make a world of difference. At a micro-level, selecting an exposed, rocky point for your tent rather than a sheltered forest site utilizes natural wind to keep the insects at bay. This is not about enduring the bugs; it’s about outsmarting them, which is a key component of your trip’s success and your overall well-being.
Plain of Six Glaciers or Berg Lake: which requires more logistical prep?
Not all mountain hikes are created equal. A common mistake is to assess fitness based on distance and elevation alone, ignoring the critical factor of logistical complexity. A comparison between two iconic Canadian Rockies hikes—the Plain of Six Glaciers near Lake Louise and the Berg Lake Trail in Mount Robson Provincial Park—perfectly illustrates this point. While both are stunning, the level of self-sufficiency they demand is worlds apart, and your fitness must be assessed against this reality. The Plain of Six Glaciers is a day hike that, while strenuous, begins in a highly accessible area and even features a teahouse partway up the trail. An emergency exit is a matter of hours.
Berg Lake, on the other hand, is a multi-day backcountry commitment. The logistical hurdles begin long before you reach the trailhead, with a competitive booking system and a remote starting point. Once on the trail, you are truly on your own. As the following comparison shows, the requirements are fundamentally different.
| Factor | Plain of Six Glaciers | Berg Lake |
|---|---|---|
| Booking System | No booking needed (day hike) | BC Parks opening day rush |
| Trailhead Access | Walk from Lake Louise village | Remote trailhead requiring vehicle |
| Emergency Exit | Short walk to world-class resort | Multi-day self-evacuation required |
| On-Trail Facilities | Historic teahouse available | Basic tent pads only |
| Acclimatization Needs | Starts at 1700m – requires prior days | Starts at 800m – gradual ascent |
This table, based on information from parks authorities, highlights a crucial concept: contingency fitness. On the Berg Lake Trail, a twisted ankle or a washed-out bridge doesn’t mean a simple retreat; it means deploying your backup plan, rationing extra food, and potentially a multi-day self-evacuation. Your fitness must be sufficient not just to complete the planned 42km, but to handle an unplanned 60km. You must have the physical and mental reserves to deal with the unexpected. The Plain of Six Glaciers requires fitness to complete the hike; Berg Lake requires fitness and a robust skill set to survive it if things go wrong.
Heli-rescue vs. Ambulance: understanding the $10,000 difference if you get hurt remotely
Let’s be blunt: misjudging your fitness in the Canadian backcountry can be a five-figure mistake. The cost of rescue is the ultimate, non-negotiable penalty for a lack of preparation. Many hikers have a vague notion that rescue is “free” in Canada, which is a dangerous half-truth. While volunteer SAR organizations do not charge for their time, the chain of command for a rescue involves multiple agencies, and you are financially responsible for certain parts of it. When an SOS is triggered, the call is routed to the RCMP, who task the provincial SAR authority. They assess the situation and decide if a helicopter is needed.
This is where the costs begin. According to sources familiar with mountain rescue logistics, mountain rescue helicopter operations typically cost between $2,000 and $5,000 per hour of flight time. A complex search or a hoist rescue in challenging terrain can take several hours. While the SAR portion itself may be covered, the subsequent journey from the trailhead to a hospital is not. This is considered medical transport, and if it requires an air ambulance, the bill is yours. This “handoff” from SAR to the healthcare system can easily result in a charge of $10,000 to $15,000 for a single remote mountain evacuation.
This financial risk must be part of your fitness assessment. Are you prepared—both with specialized insurance and an understanding of the process—for this worst-case scenario? Being “fit” also means having the foresight to mitigate these catastrophic financial consequences. Ignoring this aspect is like hiking without a first-aid kit; you are betting that nothing will go wrong, a gamble no experienced mountaineer would ever take. The cost of a satellite communicator and a proper adventure insurance policy is minuscule compared to the potential debt from one bad decision or one moment of bad luck.
Key takeaways
- Your fitness must match the specific logistical and environmental demands of your chosen Canadian region and trail (e.g., Berg Lake vs. Plain of Six Glaciers).
- The “fitness equation” includes physical strength for heavy loads, mental fortitude against isolation, and logistical preparedness for factors like insects and wildlife.
- Underestimating your limits has real financial consequences; remote heli-rescues are costly, and standard insurance is insufficient.
How to train for the elevation gain of the West Coast Trail or Skyline Trail?
Now that you have a realistic understanding of the multi-faceted demands of a Canadian wilderness trip, you can train with purpose. Generic gym workouts are insufficient. You must simulate the specific stressors of your chosen trail. The training for the West Coast Trail on Vancouver Island, with its endless ladders and muddy, undulating terrain, is fundamentally different from preparing for the sustained high-altitude exposure of the Skyline Trail in Jasper National Park. It’s about training for the task, not just for general fitness.
For the West Coast Trail, your training must focus on functional, full-body strength and eccentric muscle control. The trail features over 100 ladders, requiring you to climb and descend with a heavy pack. This means weighted step-ups, box jumps, and especially weighted step-downs to prepare your quads for the relentless descents. For the Skyline Trail, where over 25km of the trail is above the treeline, the challenge is sustained cardio at altitude. Your training should involve long sessions on an incline trainer or stair machine with a weighted pack, and if possible, training at the highest elevation available to you to begin acclimatization.
You don’t need to live in the mountains to train for them. The “Canadian Flatlander’s Urban Training Solutions” case study proves this. Athletes in Toronto use office building stairwells for repeated ascents, while those in Saskatchewan use grain elevators and highway overpasses for elevation training. The key is creativity and specificity. High-resistance cycling, weighted lunges, and dedicated core stability work are accessible everywhere and directly translate to better performance and injury prevention on the trail.
Action plan: Tailored training for iconic Canadian trails
- West Coast Trail Focus: Incorporate high-repetition step-ups and box jumps into your routine to simulate the 100+ ladders on the trail.
- West Coast Trail Strength: Perform loaded carries (e.g., farmer’s walks with heavy dumbbells) to build the functional strength needed for its constantly undulating terrain.
- Skyline Trail Focus: Complete long, sustained sessions on a stair machine or treadmill at maximum incline while wearing a weighted pack to build high-altitude endurance.
- Skyline Trail Acclimatization: If possible, perform some of your final cardio training sessions above 2000m to begin adapting to the altitude.
- Both Trails – Downhill Prep: Focus on eccentric muscle training with slow, controlled, weighted step-downs to prepare your quadriceps and knees for long descents.
Your journey into the Canadian wilderness begins long before you reach the trailhead. It starts with this honest assessment. By respecting the environment, understanding the risks, and training with specificity and dedication, you honour the challenge ahead. The next logical step is to build your personalized training plan based on these principles and secure the right gear and insurance for your chosen adventure.